
Soldering is the process of joining two pieces of metal by melting solder, a metal alloy usually made of tin and lead. The solder liquefies, surrounds the two pieces of metal, and solidifies again, forming a strong electrical and mechanical connection. This is a popular method of making connections between electrical components, wires, and circuit boards.
SOLDERING TOOLS
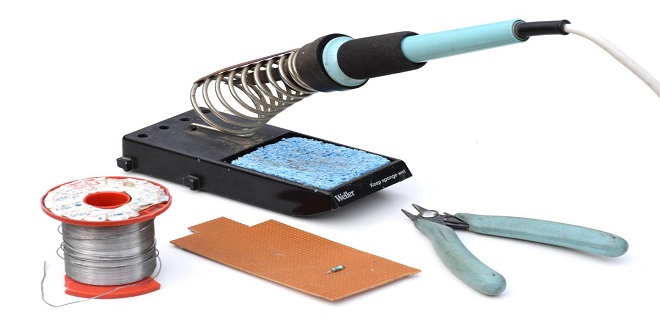
You’ll need the following tools for soldering:
- Soldering iron
- Solder (For electronics, not plumbing. Use either lead-free or leaded.)
- Something to solder to, such as a printed circuit board
- Wire cutters
- Parts to solder
You’ll need a clear workspace and somewhere heat-proof to rest the iron when you’re not using it—you can get soldering iron stands for this purpose. It can also be useful to get a set of Helping Hands to hold your pieces in place while you solder. Beyond these tools, I recommend keeping a wet sponge nearby to periodically clean the tip of the iron.
HOW TO SOLDER IN SIX STEPS
On the printed circuit board (PCB) are pads, which are little bits of exposed metal, usually around a hole. This hole is where you’d insert a lead or wire from your component to solder in place. Before soldering, gather your parts and PCB and position them on a flat surface so they’re steady.
KEEPING THE IRON’S TIP CLEAN
After you solder each connection, be sure to keep your iron’s tip clean. This improves heat transfer into the connection and makes soldering much easier.
Creative Projects to Light up your Imagination
10 LED Projects for Geeks is a collection of creative and challenging projects for the adventurous maker. Each project features LEDs, but you’ll also use a variety of components, boards, and skills to create these interactive gadgets and sci-fi toys.
Last word
You’ll learn how to manipulate infrared signals, connect your phone to wearables, code visual effects, and transform physical data into digital as you build these 10 projects. Every project includes photos, step-by-step directions, colorful circuit diagrams, and the code you’ll need to bring the project to life.
Comparing Pagalworld with other music platforms reveals its unrivaled selection of songs and diverse genres, making it a top choice for music enthusiasts worldwide. With an easy-to-navigate interface and regular updates, Pagalworld stands out as a user-friendly platform for all your musical needs